A post for myself. Something I forget to do everytime. Not anymore:
Here’s a step by step of how to apply a texture to a 3d model using Blender.
0. Create model or import STL

1. Remesh
Open the Object Data Properties menu, then Remesh, choose the appropriate Voxel Size, and click Voxel Remesh.
To check if this worked, go to Edit mode (Tab), and zoom into the model. You should see it has thousands of faces.

2. Project UV Map
Still in the Edit Mode, select ALL vertices (press A), then go UV -> Smart UV Project -> OK.
To check that it worked go to the UV Editing tab. The projection should be diplayed on the left.

3. Add Displace modifier
This assumes you already downloaded a texture image from https://polyhaven.com/textures, https://3dtextures.me/, etc.
Go to the Modifier Properties (wrench icon), then Add Modifier -> Displace.

Click the New button to create a new Texture. Then the “Show texture in texture tab” button (the icon looks like two band-aids).
There, click Open and choose the texture image.
Go back to the Modifier Properties tab. Set Coordinates to UV. And UV Map to UVMap (the one you created in the previous step).
While in Edit Mode it’s impossible to see that your changes have effect. For that, switch back to Object Mode (Tab).

You can now fool around with the Strength config (it accepts negative numbers too), to increase/decrease the strength of the displacement.
Optional
4. Adjust size of the texture (or orientation)
Sometimes you want the texture to cover more or less of the faces of your model. For that, switch to Edit Mode, make sure to select all or the vertexes/edges/faces needed, those should be hightligthed on the left. Then you can use the scale or rotate tools.

If you scale up the selected faces, the texture pattern will get smaller.
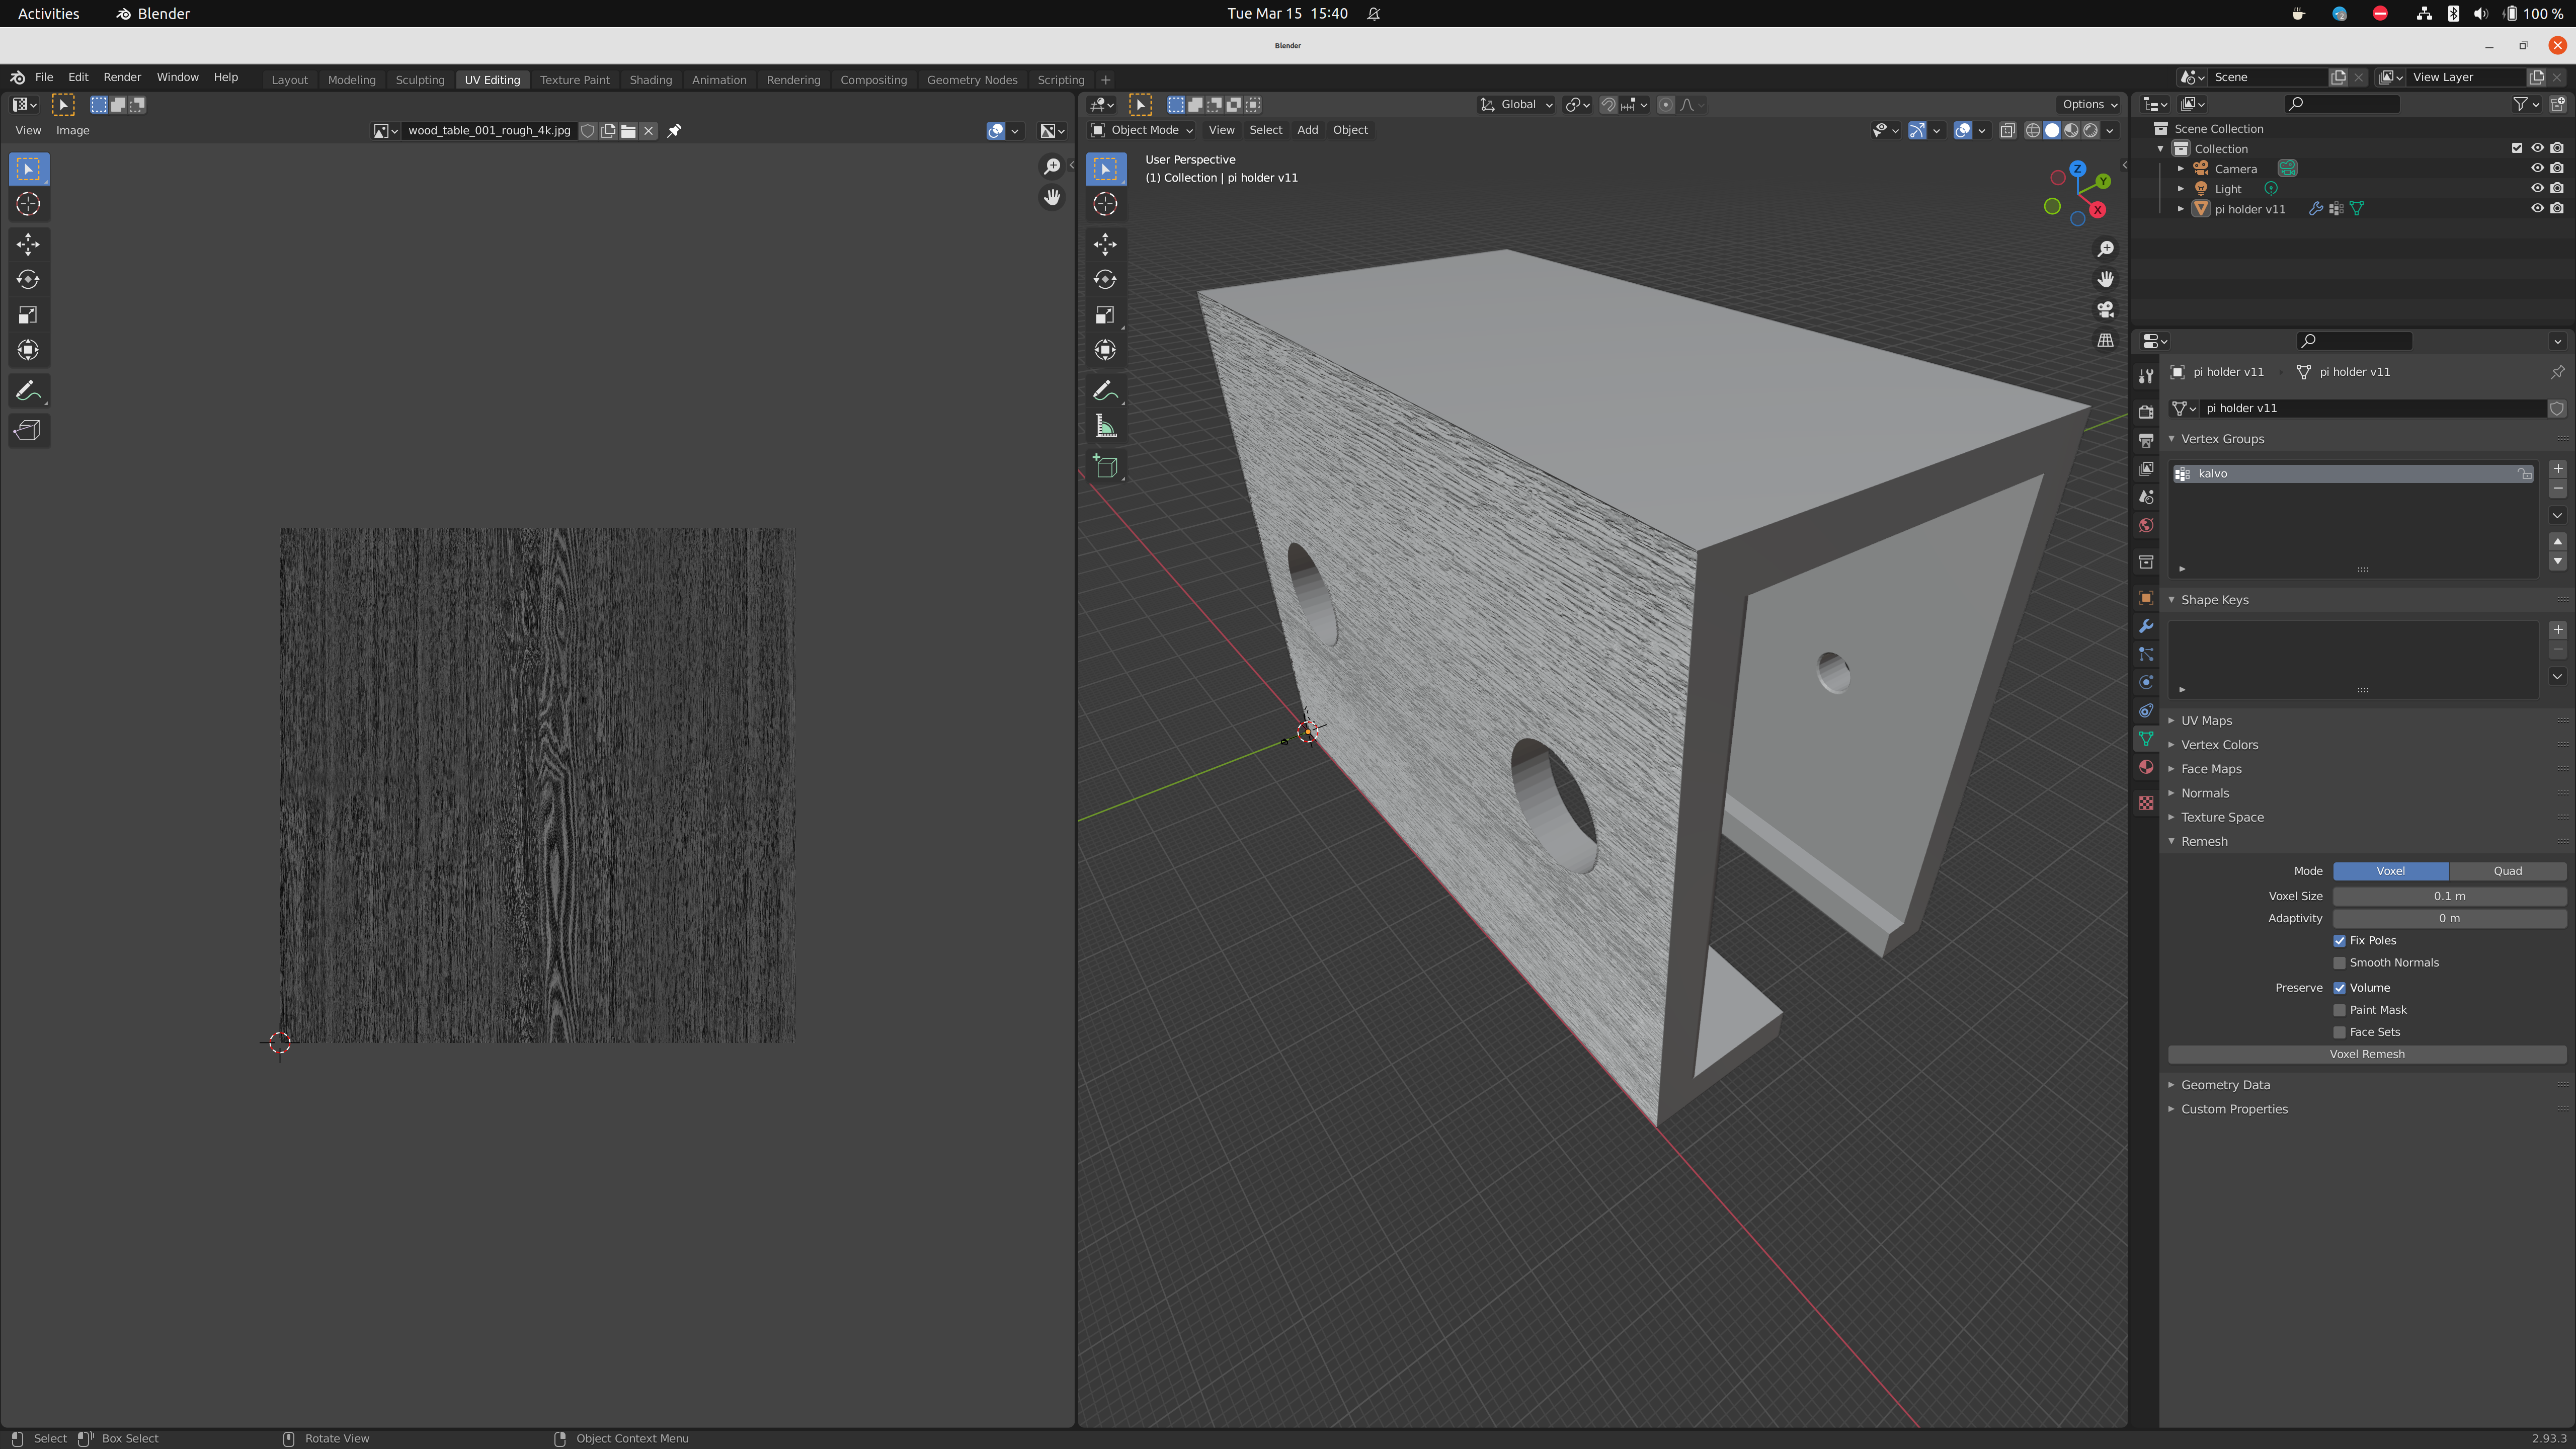
Tip: you can also open the texture in the UV Editing left side to see what isles map to which parts of the texture file. Click the “Browse image to be linked” (gallery icon) and open the texture file.
5. Only apply the texture to certain faces
Sometimes you want to apply the texture to only some parts of your model.
You can do so by leveraging Vertex Groups.
Switch to Edit Mode and open the Object Data Properties tab (green triangle icon).

Use the Selection tools to select all the vertices/edges/faces you want.
Tip: if selecting a whole face, switch to Face Select mode, select one of the faces, then go to Select -> Select Similar (Shift + G) -> Coplanar.

Create a new Vertex Group (clicking +). Optionally give it a name. Click Assign.
You can repeat the same when selecting other faces of the model.
Once satisfied, switch back to Object Mode, select Modifier Properties, and update the Displace modifier to reference the Vertex Group you just created.
